Monday 28 August 2017

How to Disable Control + Alt + Delete on Log-in

Requiring the option to press the keys Ctrl + Alt + Del before you see your Windows log-in screen is actually a security setting which makes sure that the next screen after is really the real windows log-in page.

There are many tricks nowadays wherein people can copy precisely the appearances of websites and that can be done in our stand alone work stations as well.

If however you would like to disable this feature, here are the steps:

1. Click the Start Button then Control Panel.

2. Search and click User Accounts.

3. Click Manage User Accounts.

4. Click on the Advance Tab.

5. Don't select Require users to press Ctrl + Alt + Delete.

As easy as that. To have it shown again, just follow the steps and click the last option.

Saturday 26 August 2017

Common Networking Devices and their Functions

This is a very brief article about the different devices used in a network and their particular purpose.

1, The most common end points in our networks are the computers. Inside the computers we have the Network Interface Card or NIC. This is what allows our computers to be able to communicate in the network. We do have the wired and the wireless. It is in these NICs where the Media Access Control Address or MAC Address is burned to. No two NICs can have the same MAC Address. This is for the purpose of identification.

2. The switch is most commonly what is on the other side of our cables connected to our devices. The purpose of the switch is simple; to allow our devices to communicate internally and to be able to connect more devices in one network. Embedded on each switch port is the ASIC, Application Specific Integrated Circuit which allows simultaneous data transfer as contrast to the old hub which only allowed one communication at a time no matter how many ports it has.

3. The router. I have written a more detailed article about a router here. But, mainly, a router's role is to allow our devices to communicate to other networks.  It serves as the receiving point in and out of the internet which the switch is not capable of doing.

4. The cables.  In networking, you will always encounter different types of cables with different purpose, specifications and limitations. The most widely used cables are the Twisted Pair and Fiber Optics. These cables are very much different. The twisted pairs have a limit of 100 meters and use pulses of electricity to transmit data while the fiber optics use Light Emitting Diode and Laser technology and are used for very long distances ranging from 2 to 100 kilometers.

So, to summarize, all we need are these four essential devices / materials to be able to create our networks. 

Friday 25 August 2017

CISCO: How to Pass the CCNA Exam?

I have had my fair share of asking this question many times over before I started to embark on my journey for the exam.

Like others, I also did lots of google searches with the exact question "How to pass the CCNA exam".

You know what I found? Nothing that I did not already know. I knew the answer all along but I just had to see them written down by someone else to trick myself to believe that which I already know.

I reckoned from the beginning that the journey will include lots of hard work, time, focus and dedication, and I was just a fool not to let myself believe that it is indeed as such.

So...

I wandered about, searched a lot and wasted time on the internet looking for a possible loophole or magic trick to make this easy, but i found none.

In short, a few weeks later and still, I was going nowhere.

Fast forward a month and a half, I passed the first exam.

After another two months, I passed the second. If that is not a fast-paced journey for you, I don't know what is. 

I could not have passed the exams sooner.

How did I do it? Here's how.

1. I have a bit of an edge because I just then recently passed two exams and got Comptia A+ certified.

2. I downloaded and printed all the CCNA exam objectives

3. Each time I knew and got comfortable with an exam objective, I cross it out

4. The best part of my journey started when I watched video tutorials. I would advise that you watch first the videos from CBTNuggets' Jeremy Cioara. He's got the basics very much covered and very well explained. Just watch them and catch whatever you can.

5. After finishing Jeremy's tutorials, go and look for Kevin Wallace's CCNA videos. These are more than 300 videos but are just ranging from 1 to 8 minutes short.

6. Now, the techniques start here. For the videos with concepts that don't include configurations, you can watch these out over and over until you get the lesson, technology or concept.

7. For the videos on concepts that have configurations, this is my approach. 
Watch the video with the configuration on YouTube and take notes of the steps and commands, perform the configuration while using the YouTube video as your guide. Repeat the configuration without any guide.

For tutorials visit this link.
For first time in the Cisco Command Line this is very useful.
Learn SUBNETTING HERE

8. Move on to the next concepts and configurations.

9. Have a review of all the concepts and configurations on a weekly basis. Do the configurations from the oldest to the latest. Now your building up. You will notice that you now know more than you used to.

10. Get a hand on every practice test that you can.

11. Join Facebook groups. Be involved with the discussions and Q and As.

12. Practice subnetting as much as possible - this is the key. You should be able to answer any question in less that two minutes. Practice at https://subnettingpractice.com/

13. Do not overload yourself. The exam can be taken in two ways. One way is to take it in two exams ICND1 (100-105) & ICND2 (200-105). Or you can take the exam as a whole CCNA (200-125).

14. I used to practice the configurations with a headset and loud music on to avoid distractions. Find out what suits you.

15. On the day of the exam, write all that you can in the board that they will give you. Write your subnetting chart, your multiples or what not, it's totally up to you.

I could not give out any more tips or tricks, that's just it. Repetition, repetition, repetition.


It's hard. And hard is good, right? Remember, "If it was easy, everybody would do it".

CSS: Computer Hardware Components

In order to pass the CSS Exam from TESDA, we should be knowledgeable about the components of a computer system and their functions.

In this blog, we will tackle these components As Fast and As Simple As Possible.

1. The CPU. The CPU - Central Processing Unit, commonly called processor is where all of the functions, tasks, and computations occur. Although it is the powerhouse center, it cannot do these processes alone. It needs other components to do its tasks. 

The two prominent manufacturers of CPUs are Intel and AMD.

2. The Motherboard. The motherboard is the framework of the computer system. It is the component in which all of the other components are connected and inserted. In the motherboard also resides the data busses. Data busses are pathways on the motherboard that allows the transfer of instructions from one component to another. External components such as monitors, speakers, microphones and USBs also connect to the motherboard.

You will also see the Northbridge and the Southbridge in the motherboard. The Northbridge controls the data pathways and communication of the heavily used components of the system; the memory, cpu, video. The Southbridge, on the other hand, controls communication on the "not so important" and minimal components of the system; the usb, serial ports, BIOS, audio et cetera.

3. The Memory or RAM. The memory does not control anything. It serves as the storage of all the functions, applications, services, programs, features, instructions that are being utilized by the CPU. It is in the memory where our Operating System is loaded. 

To have an idea of the memory's function, imagine this scenario.

Your computer has 1 gigabyte of memory. When the Operating System is loaded, it occupies let's say, about 100 Megabytes. You then opened a few web browsers, lots of websites (YouTube, Facebook, Twitter), and you also opened PC applications such as Microsoft Word, Powerpoint, Photoshop et cetera. You will then notice slowness on your computer depending on how occupied your memory is. If you've reached the maximum of 1 Gigabyte, some systems tend to see the BSOD Blue Screen of Death error. This is the result of memory overload wherein the memory has to offload a few programs or functions to accommodate to the ones being currently used by the processor.

4. The Hard Disk Drive. The HDD is our non volatile storage. Contrast to the memory being volatile (it loses all data on power loss), the HDD retains all that is saved permanently. When we first install our Operating System, it is saved in the HDD, a recovery partition is also created amounting to 100 to 300MB. This allows for system recovery in case of errors. 

The HDD is also where we save our files; music, videos, documents, pictures et cetera. When you install an application, it is also installed in the hard disk drive.

The newer version of the HDD is the SSD or Solid State Drive. They both function as storage but instead of using disk platters, SSDs use Integrated Circuits and memory organized as disk drives.

Now, these are only the main components of the computer system. There are still quite a few that contributes to the total functioning of the system.

Networking: What are the functions of a Router?

Routers function the same way, may they be used at home or in large businesses. Essentially, their role is to connect one network to another right? That’s where the name was derived from, “Router”, to route from one place to another.

ASIDE FROM THIS, A ROUTER HAS OTHER FUNCTIONS.

A router functions as your computer’s “GATEWAY” to other networks. Have you ever noticed that when you are configuring your computer’s IP address statically you are required to fill out a couple of configurations? 

1) The IP address
2) The Subnet Mask
3) The Default Gateway
4) The DNS Server

The “Default Gateway” is most of the time, if not always, the IP Address of your router.

For example you input 192.168.1.1 as your default gateway, you just then instructed your devices (computers) that whenever they want to reach an address that they do not know (meaning, the address is not on their network), throw the data on your default gateway which is 192.168.1.1. That is how we are able to communicate out of our networks to other networks and most of the time, to the internet.

The router also serves as our DHCP SERVER. DCHP stands for Dynamic Host Configuration Protocol. This functionality allows our routers to distribute IP addresses to any clients connected to the network. 

THIS IS BENEFICIAL IN TWO WAYS

1. If you have hundreds of devices in your network, you won’t have to go and configure them one at a time statically. 

2. You avoid having duplicate IP addresses in your network since the router is the one assigning them.

Another function of the router is to be our Port Address Translator (PAT) or Network Address Translator (NAT). Technically, the IP addresses that we have in our internal networks won’t work when we would like to communicate to the internet. That’s why we have routers to help us get there.

When for example you wanted to open a Facebook page. Before your packet (request) leaves the router, your IP address must be first converted to an IP that is publicly routable. And what address would that be? It is the address that was assigned to you by your ISP – Internet Service Provider.

Suppose you have fifty devices inside your network, that would mean that you will have to have fifty internal IP addresses right? But every time someone connects outside your network, the address always will be converted to that one external IP address. That’s why when you launch a cyber-attack, they can always trace it back to your external IP as the source.

To know your internal IP address, just open a Command Prompt and type ipconfig /all” without the quotes.

To know your external IP address, go to google.com, then type “What is My IP”.


Lastly, our routers function as our DNS SERVER. DNS means Domain Name Service. This functionality is simple to explain. Remember that our devices cannot understand human language? They always have to convert it to decimals and binary. So, if we put Facebook.com in our address bar, the computer does not know what that means and will not look for the word “Facebook.com” in the internet. Instead, the DNS role would then have to convert “Facebook.com” to an IP Address that the computer would understand. 

To know the IP addresses of websites, open a Command Prompt, type “ping –a” followed by the website of your choosing. In this case, one of Facebook’s IP is 157.240.20.35.


Cisco: How Simple is the Cisco Command Line?

The Cisco Command Line interface is similar to that of our Windows’ command line or command prompt as we call it. It is in here that we input our commands to configure our devices on how to function. There is no Graphical User Interface but you’ll be surprised of how easy it is.

As with other interfaces, the CLI – Cisco Command Line Interface accepts Tabbing (hitting the “TAB” button) to auto-complete the words. But there are limitations on how this is used. For example, suppose you are typing a command that starts with “A” and the CLI database contains 10 commands that starts with “A”, surely the TAB input won’t initiate.

Consider these:

Apple
Append
Alpha

In the Cisco CLI, if you typed “A” then hit “TAB”, nothing will happen. However, if you typed “Al” then hit “TAB”, this will auto-complete to “Alpha”. The CLI checks for ambiguity.

Next, the CLI is made up of three (3) main levels and a lot of sub-levels after. For the purpose of this lesson, we will only discuss the three (3). .

1. User Mode – this is represented by a “>” sign. Router>
This mode is used to invoke a few show commands and there’s nothing much to do here.

2. Privilege Mode – this is represented by a “#” sign. Router#
This mode has a few show commands and save commands but that’s all.

3. Global Configuration Mode – this is represented by “(config)#”. Router(config)#
This mode or level is where we are interested in. This is the part where we can configure the entire device.

Well, since we are talking about the command line, let’s list the commands to change CLI Mode.

1. Enable – this is the first command that you will type over and over again whenever you are going to configure devices. This simply gets you from User Mode to Privilege Mode.

2. Configure Terminal – you will have to input this command every time. This moves you from Privilege Mode to Global configuration Mode. Once you are in this mode, you can do configurations that will affect the whole device. You will also have the option to go a little further to configure specific areas such as the ports on the devices, the virtual and console terminals etc.

3. Now to go back 1 level just type "exit".

Some of the configurations you can do here are:

1. Changing the device’s hostname. A hostname is the name of the device.
2. Setting a password for the device. Well, we all want our devices to be secured, don't we?
3. Creating a banner or as we call it often, the log on message.


Check out the video for the tutorial: Cisco Initial Configurations
Packet Tracer Student Version here: Cisco Packet Tracer

Security: Facebook Hack - Make Your Account Secure

Disclaimer: This is for educational and informational purposes only.

Check video here: Facebook Security Tips in 2 Minutes

There's no easy way to hack a Facebook account nowadays. But believe me, there is still a way. Since the advent of the Bug Bounty Program of Facebook, lots of its vulnerabilities have been patched out immediately. This approach has made Facebook more secure than ever. Facebook phishing is one of the only ways to hack someone's account that is found to be working now since this relies on social engineering and does not rely on Facebook's design and security.

However, I have recently reported a vulnerability to Facebook but this was their last reply:


So, I thought that since Facebook does not see this as a vulnerability and won't do something about it, I decided to make people aware though this blog.

So how does this work? 

Steps:

1. Go to a user's Facebook Page.
2. Get the user's Facebook ID.
3. Open another browser and open Facebook.com
4. On the page, click on "Forgot Account" then paste the user's ID.
5. Initially Facebook will send a 6-digit code to the email of the account owner. Just ignore that and click "Did not get the code"
6. Other options will then show like below:

7. As you can see in the picture, the user an email associated with his/her account.
8. The key here is to guess / get the user's email addresses. The users usually just use their names combined with their day of birth, year, anniversary etc.

* suppose you have other ways to get the email address, go directly to step 13.

9. Some emails are hard to guess but on the picture you will have a clue. The first and the last characters of the email will appear together with asterisks in between like B***************7@yahoo.com.
10. So, the email begins with "B" and ends with "7" and the domain is yahoo.com. What's interesting also is that the number of asterisks represents the actual number of the hidden characters.

* yes you can zoom in and count them

11. Trial and Error - once you come up with a possible email address, go back to the Facebook page, open a new tab, go to Facebook and click "Forgot Account" then paste the email that you got.
12. If it matches that of the user's email, well and good. If not, try another combination.
13. If you got the correct email, go to the email provider. E.g if it is gmail go to gmail, yahoo if it is yahoo then paste the email address.
14. You'll want to see something like this:

15. This means that an email address is associated with a Facebook account but the email does not actually exist. If the email does exist, move on dude. It's even harder to hack a gmail or yahoomail account.
16. Create the email. Use it to reset the password of the user's Facebook account.


17. Finish. 

Note that additional Facebook security are in place; 2 Factor Verification and Defense in Depth Mechanisms like ID upload, Identify Recent Comments, Identify Pictures of Friends, Text a Code to Phone etc.

Generally, the idea is that whatever email addresses you have linked to any of your accounts, not only on Facebook, make sure that they are secure and make sure that they haven't expired yet.

Emails expire after 5 years when they are not opened.

So, let's make our accounts secure as much as possible.


CSS: Creating our CSS NCII Virtual Lab Part 1

Nothing can replace hands-on experience, it's true. A study was conducted and it proved that you are more likely to remember something if you actually have done it. That's why a virtual lab is important. I, for one, have had a few labs of my own. I started when I practiced for my CompTIA A+ exams, I also had a lab for when I was studying for CISCO, I had one when I did a self study on Computer Systems Servicing NCII and I have one now while I'm on track for my Windows Server certification. I always did remember a lot through the use of these labs wherein a did tasks one after another more than once. And whatever configurations I did, did not affect my physical device's setup.

Virtual labs are made possible by the technology known as virtualization. It literally has broken the barrier to lots of things. Let's enumerate and explain some.


1. Before, in order to do a practice using two (2) computers, you really would need to have two (2) computers. But now, not anymore. With virtualization, you can build another computer or even more on top of the existing system that you have.

2. Virtual labs are safe for practice. Safe in a sense that if you try to configure something that has a potential to disrupt your configuration totally, you need not worry because if you made a mistake you just build it again and that has no effect on your physical system.

3. In a business perspective, companies don't need to have hundreds of bulky heavy machines in their environment. Nowadays, they maximize the use of virtualization by building all of their servers in just one, two or three physical machines. This has greatly reduced the cost for purchase and maintenance.

Virtualization does have tons of benefits but for our purpose, we only need to learn a few - the basics. It does have, as most things do, some catch. The first concern is the ability of your device (desktop / laptop) to support virtualization. If it does, how many machines can  it support? Typically, the ideal machine to build a virtual lab on is one that has is a 64-bit architecture.

64-bit systems break the limit for memory usage, thus, you can have more than 4 GB in your system. Keep in mind that when you create one (1) virtual machine, the resources that you allocate to it are really being taken from the physical machine.

For instance, consider the following specifications:

This machine only has 3 GB of memory. It's possible to create a virtual machine on top of this device but it will greatly strain the physical machine. If I gave the virtual machine 1 GB of RAM, the physical machine is left with 2 GB which is not enough to carry out multiple processes at one time. Can't we add some memory then? Yes, we can. But since it's a 32-bit Operating System on a 32-bit machine, we can't exceed more than 4 GB.

If your machine is virtualization capable, we can create our virtual environment. Please download the following installers that we will use.

Note that you need to register before you can download.


CSS: Computer Systems Servicing NCII

What is Computer Systems Servicing (CSS NCII)?

Computer Systems Servicing (CSS NCII) is the upgraded version of what is then called Computer Hardware Servicing (CHS NCII) qualification. During the late CHS, the qualification was said to be of the NCII level, meaning that in a ranking basis, it is the baseline level.

Some competencies have the NCII, NCIII and NCIV levels. CHS was given an NCII level because, well, for a fact, it was not that difficult to pass, but still, many students and/or even professionals fail.

When TESDA decided to upgrade the CHS competency, they forgot or maybe they have just decided not to adjust its ranking level. Most IT professionals would certainly agree that the CSS competency deserves to be of the NCIV level.

What are the differences between CHS NCII and CSS NCII?

The old CHS competency covered just two (2) modules and you are only expected to perform a couple of tasks to pass the actual examination. The examination includes a question and answer portion before proceeding with the actual hands-on configurations and the same goes for the CSS NCII exam.

To cope up with the hastened trend of technology advancement, CSS was introduced, and instead of having just two (2) modules, this new competency has four (4). This seems to be a great move to ensure that we are not left behind on what is the new global standard in technology.

What are the four (4) modules of Computer Systems Servicing?

Install and Configure Computer Systems

This module expects that you can do the following:
  1. Disassemble a computer system
  2. Take inventory of everything that you remove from the system until the case is empty
  3. Assemble the computer
  4. Create a bootable USB  using Rufus application or DISKPART command
  5. Configure Basic Input Output (BIOS) setup
  6. Install an Operating System
  7. Create multiple partitions (three (3) partitions) with corresponding percentages
  8. Install the drivers
  9. Install the applications (MS Office, Anti Virus) and pin them on the desktop
For personal practice, you will need the following:
  1. 1 computer set
  2. 1 screw driver
  3. 1 USB
  4. Rufus Application
  5. Microsoft Office (any version) installer
  6. Anti-virus software
  7. Computer drivers (Driver Pack Solution)
  8. Microsoft Operating System ISO image
The tasks are fairly easy to perform. The catch though is that you should be familiar about the different hardware components of the system, their versions, functions and importance.

The good news is that we will tackle every important detail about this and every module on each succeeding post on this blog. Links on the tools (software / installers) will also be provided.


Setup Computer Networks

This module expects that you can do the following:

  1. Create cables – crossover, straight-through, patch panel
  2. Configure a wireless router
  3. Configure an access point
  4. Connect the devices – one (1) laptop, one (1) desktop client, one (1) desktop server
  5. Test connectivity
  6. Create folders and configure shares
For personal practice, you will need the following:

  1. One (1) laptop
  2. Two (2) desktops
  3. Unshielded Twisted Pair (UTP) cables
  4. Registered Jack #45 (RJ45) 
  5. Crimper
  6. Cable Tester
  7. One (1) router
  8. One (1) wireless access point (WAP)
  9. One (1) patch panel with modular box
  10. One (1) Screw driver
  11. One (1) switch
If these items are not available, you can just create your Virtual Lab for configuration practice. But the making of the cables should be practiced separately.

In the future post, we will configure a Virtual Lab environment for module two (2) practice which can also be maximized for module three (2).

Setup Computer Servers

This module expects that you can do the following:

  1. Install and configure a Windows Server 2008/2012 OS
  2. Promote the server to a Domain Controller
  3. Configure the Domain Name Service (DNS) role on the server
  4. Configure the Dynamic Host Configuration Protocol (DHCP) role on the server
  5. Create an Organizational Unit (OU) and create two (2) user accounts
  6. Join the clients (laptop and desktop) to the domain
  7. Install the File and Storage role on the server
  8. Create a share in the server and map it on the clients
  9. Create a folder in the server; share it (read/write) for FOLDER redirection.
  10. Redirect documents and desktop of the clients
  11. Configure remote desktop on all the machines
  12. Install Print Management
  13. Install a printer in the server, install the driver
  14. Configure printer deployment

For personal practice, all these can be done on our Virtual Lab.


Maintain Computer Systems

This module expects that you can do the following:

  1. Create a system restore point
  2. Create a system backup image
  3. Use the created restore point to restore the system
  4. Use the created backup image
  5. Use disk defragmenter
  6. Use disk cleanup
  7. Scan the system for viruses
For personal practice, all these can be done on our Virtual Lab.

There we go! All these tasks for eight (8) hours but I assure you, you would not need that much time.

Next, we will start with module one (1), definition of terms, the technologies, their functions and importance before we proceed with the actual task performance.


For suggestions and requests, please leave a comment.

CSS: COC2 - Setup Computer Networks


                                              STEPS and INSTRUCTIONS

1.    Create 1 cross-over cable, 1 straight-through cable and patch panel cable.
a.    I consumed lots of time on this simple task due to the dullness of the crimping tools. Bring your own if you can.
b.    Obviously, you’ll have to know the wiring standards of T568A and T568B to create the cables.
c.    Every patch panel is different, so before taking the exam, visit the assessment center and check the patch panel type and color coding. The one I used had no color coding on it.
d.    You must have every cable checked when finished at once by the assessor in order to move on.

2.    Connect all the devices together using the cables.
 2 desktops
 1 switch 
 1 patch panel 
 1 wireless router 
 1 access point 
 1 laptop which will be connected wirelessly after configuring the router and the access point.

a.    Drawing included in the reviewers.


** Additional cables will be provided

3.   Once all devices are connected, get the mac addresses of the pc, server and laptop for the purpose of assigning them IP Addresses using DHCP reservations. 

    Note the mac addresses down together with the corresponding unit to avoid confusion. To get the MAC Address, open command prompt and type “getmac” or “ipconfig”.

a.    Here, although the devices are all configured to get IP addresses using DHCP, you will be instructed to select an IP address specifically that is why DHCP Reservations should be configured.
b.    For example. Create a DHCP Pool of 192.168.1.100 to 192.168.1.200
c.    From the pool, the IP 192.168.1.114 should be assigned to the pc
d.    192.168.1.117 should be assigned to the server
e.    192.168.1.155 should be assigned to the laptop

4.    Configure the router using your web browser to access it's interface
a.    In order to access the router’s interface, look for its IP address at the back of the device. If it’s not there, you can ask the assessor. If the router’s address is indicated on the back of the device but you are unable to access it using that address, reset first the router by pressing the power button for 10 to 20 seconds. Usually, the password to access the interface is indicated also on the device. Ask the assessor if otherwise.
b.    Create the DHCP Pool as instructed; the ranges will be given by the assessor.
c.    Change the SSID and configure wireless security using WPA2.
d.    Configure DHCP reservations.
e.    Check your work by pinging the connected devices, if task is accomplished, move on to the access point.

5.    Configure the Access Point
a.    Same steps as the router, you just have to change its SSID and IP configuration that corresponds with the IP subnet you are using.

6.    Now, connect the laptop to the access point.

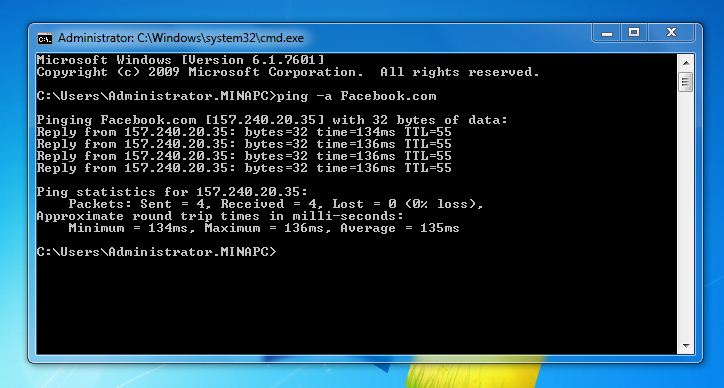
7.   Test interconnectivity of all the devices by using the “PING” command. Make sure the devices got the correct IP addresses reserved to them.

8.    Create folders on all the devices, share the folders and make sure everyone has read/write permissions.

9.    Show your work to the assessor, he will give you instructions to test your work. 

END OF module 2

COC3: Configuring Windows Server 2008 R2 or 2012

To be continued, edited and revised.

How to Disable Control + Alt + Delete on Log-in

Requiring the option to press the keys Ctrl + Alt + Del before you see your Windows log-in screen is actually a security setting which make...